Tuesday, March 29, 2011

top secret recipe: my sister's chocolate chip cookies


prepare yourself. this recipe is going to change your life. but first, a totally adorable childhood photo and a story:


my little sister sarah is actually the baker in the family. she's been coming up with delicious recipes since before she was old enough to safely use an oven and her chocolate chip cookies are, by far, the most addictive of them all. when she came to visit me this weekend she whipped up a batch and it has taken every ounce of willpower i have not to eat them all in one sitting.

before we made these this weekend she had always kept the recipe super secret. she never wrote it down, did the entire thing basically by sight, and the cookies always came out perfectly. luck? magic? genius? all of the above?

in her debut as a guest blogger - and let's be real, it was only a matter of time - she is bequeathing the recipe to you all. i know, i'm psyched too. to be honest, i'll be making triplicates and opening a safe deposit box just to keep them. i suggest you all do too. 


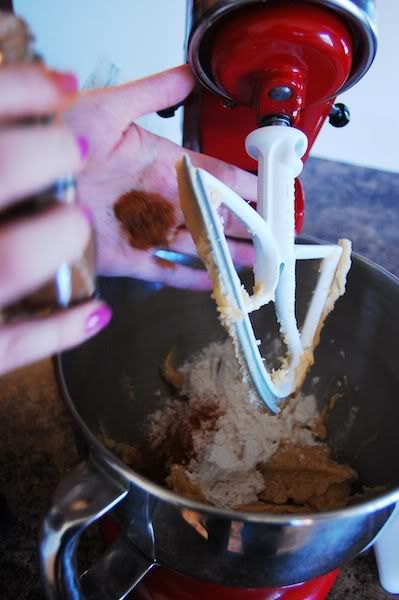
for someone who is a total control freak (me) and measures out everything (me) i was astounded when my sister just started pouring measurements out in her hand. she's a total professional. 


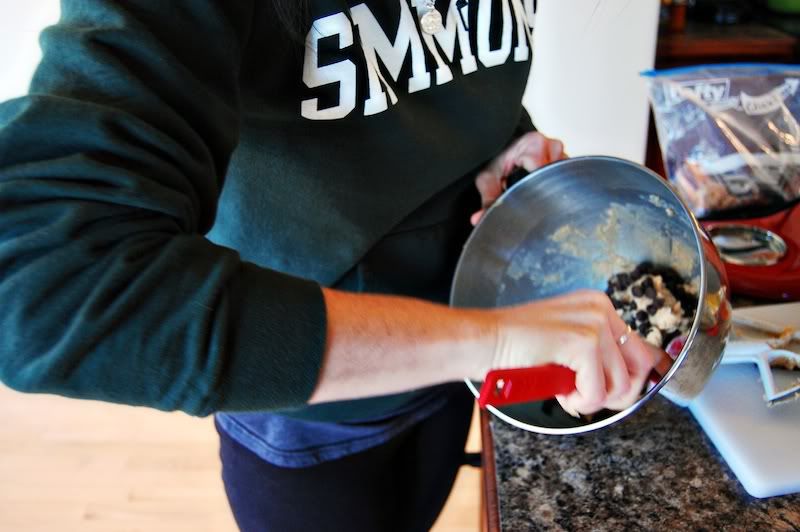
my favorite job since day one has always been mixing in the chocolate chips and this weekend was no exception. there is just something about folding in these morsels of goodness into an already outstanding dough base. 


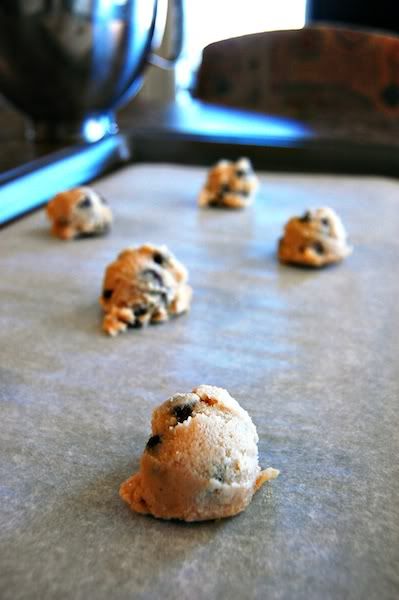
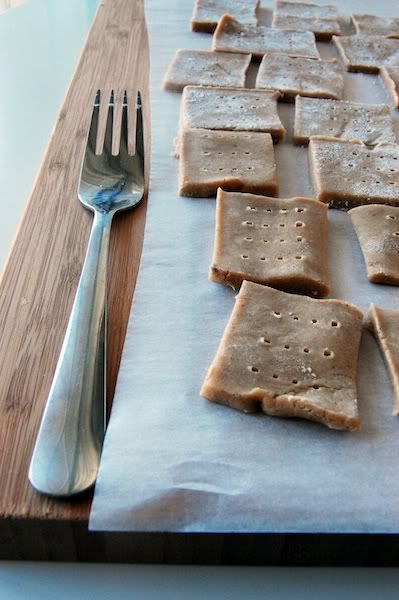
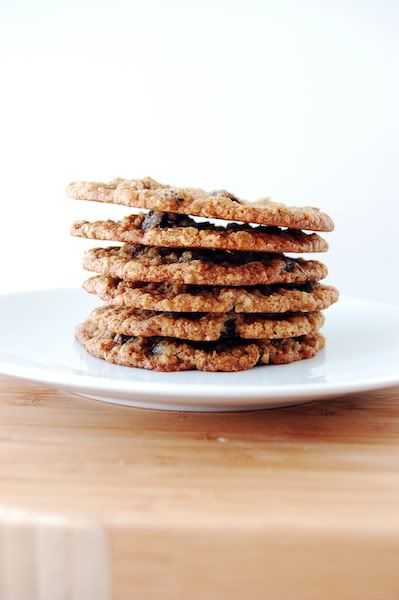
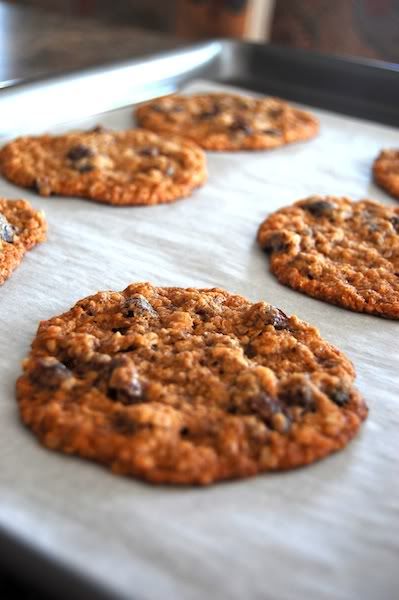
i'll warn you, these cookies are spreaders. i ended up doing six to a sheet to make sure that i didn't get a giant cookie blob, so make sure to leave your cookies some room to breathe.


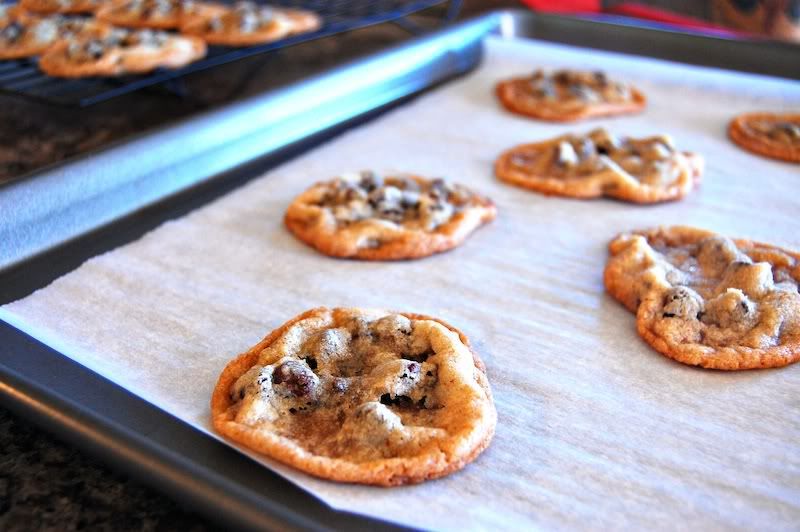
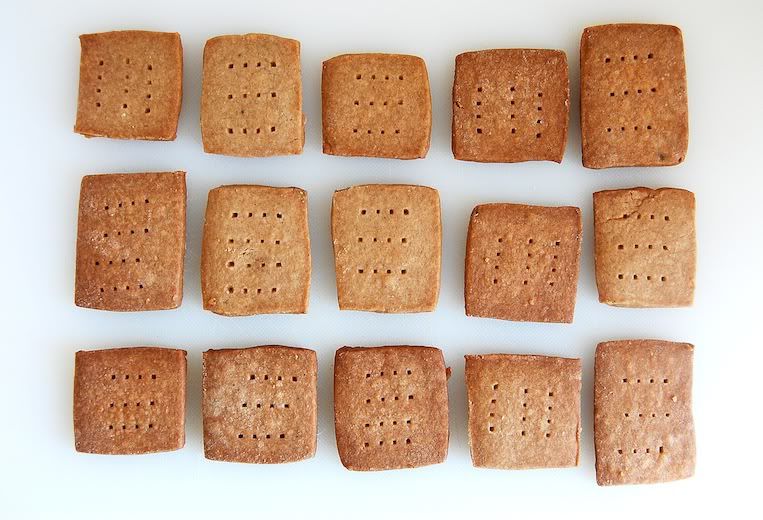
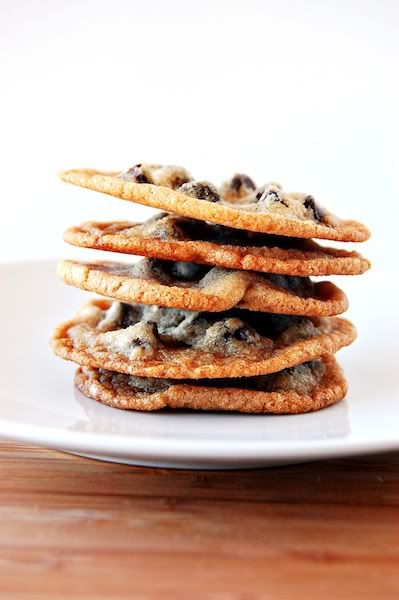
another warning, these cookies take on these amoeba shapes that i find completely endearing. this is a homemade-looking cookie. no chips ahoy circle perfection in this recipe, which is reason #92832 why it is fantastic.


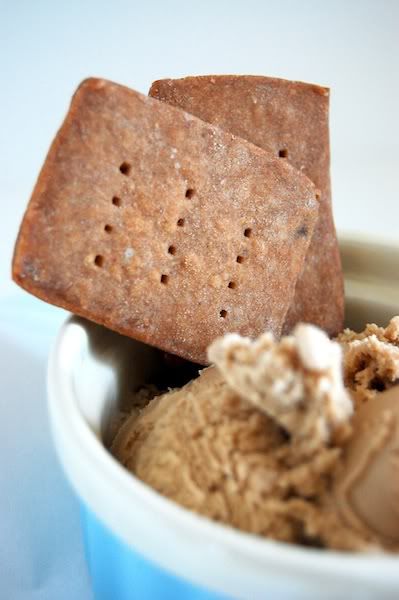
and, as if you need another excuse to make these cookies, i'm going to end with a gratuitous close up. just try to resist.


sarah's top secret chocolate chip cookies

yields 4 dozen


ingredients:

1 cup unsalted butter
1 cup brown sugar
1 cup white sugar
1 egg
1 tsp vanilla
1 1/2 cups all-purpose flour
1 tsp baking soda 
1 1/2 tsp salt
2 tsp cinnamon
1 1/2 cups chocolate chips 


1. preheat oven to 350 degrees fahrenheit and line baking sheet with parchment paper.

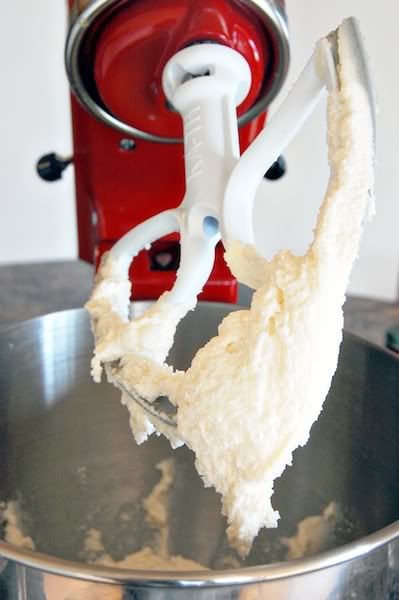
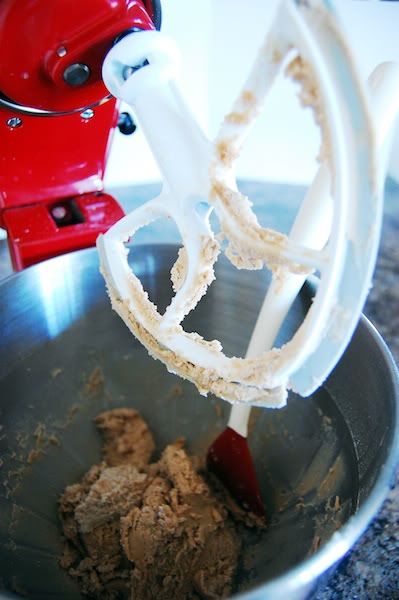
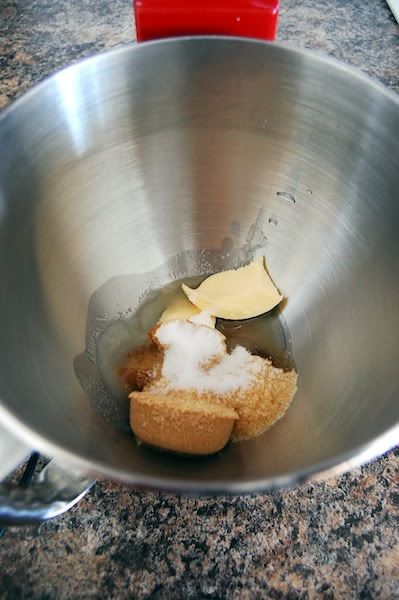
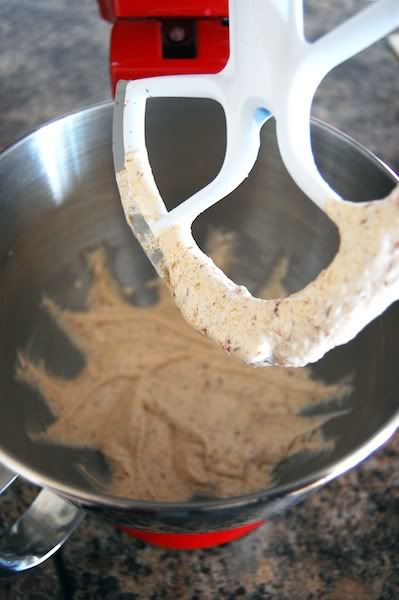
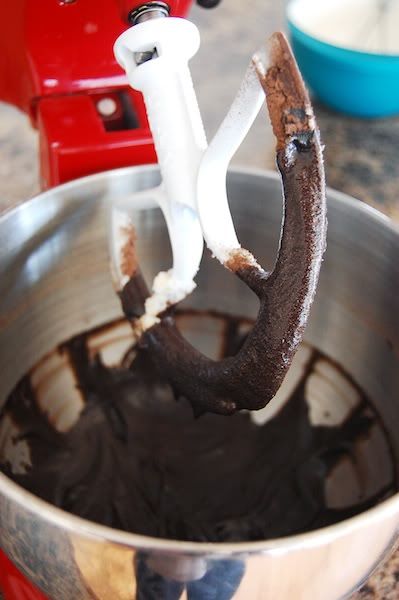
2.  cream sugars and butter in the stand of a mixing bowl until light and fluffy. add egg and vanilla and mix until evenly combined.

3. add flour, baking soda, salt and cinnamon to mixing bowl and combine.

4. add chocolate chips and stir by hand until evenly distributed.

5. drop cookies six to a sheet and baking for 8-12 minutes or until golden brown, rotating halfway through.

6. let cookies rest for 2-3 minutes on baking sheet before carefully transferring to wire rack.


nutritional information:

calories: 108, fat: 5.21g, cholesterol: 14mg, sodium: 102mg, carbs: 15.06g, fiber: 0.46g, sugars: 11.51g, protein: 0.78g. 


thanks for reading & happy baking!

amanda


Sunday, March 20, 2011

vegan almond-flax coffee cake


last week at work one of my coworkers snuck into my office and let me know that, no pressure, he wouldn't be upset if i whipped up some vegan goodies. well, with me it's ask and you shall receive, so i decided to figure out a coffee cake recipe that would be a crowd pleaser with vegans & non-vegans alike.


i'm generally a bargain hunter and rarely very brand loyal when it comes to staples like sugar or butter, but when it comes to vegan baking earth balance non-dairy margarine is really the best of the best. it creams and whips beautifully, which has been a problem with off-brands, and it's awesome for icings. the only other thing that i think is worth splurging on are extracts. i find that mccormick and generic brands leave an artificial aftertaste that is a little off-putting to me. moral of the story: be cheap when you need to be, but splurge on the good stuff when you can!


i used an 8" round for this little project but found that the pan was a little over-filled, so i would actually recommend a 9". if you have a springform grab that, it will definitely make removal much easier. also, don't forget to flour your pan!


the delicate almond flavor in this cake is well-balanced by the hearty and nutty flax meal. it isn't overly sweet, which is perfect for a cake served in the morning hours, but the crumble and drizzle do give it a little crunch and sweetness that really helps bring it all together and make it treat-worthy. 


vegan almond-flax coffee cake

yields 16 servings

ingredients

for the cake:

1/2 cup almond milk
1 tablespoon vinegar
3/4 cup vegan margarine 
1 1/2 cups granulated sugar
1 1/2 teaspoons almond extract
3 tablespoons flax meal mixed with 6 tablespoons warm water
1/2 teaspoons salt
1 teaspoon baking powder
3/4 cup cake flour
1 1/4 cup all-purpose flour

for the crumble:

1/4 cup almond meal
1/4 cup granulated sugar
3 tablespoons all-purpose flour
1 tablespoon vegan margarine, melted

for the icing:

1/2 cup confectioner's sugar
1 teaspoon almond extract
1/2 - 1 tablespoon almond milk


1. combine almond milk and vinegar in a small bowl & let curdle. combine flax meal and water in another small bowl and let soak.


2. preheat oven to 350 degrees fahrenheit.

3. lightly grease and flour a 9" round or square pan.

4. in the bowl of a stand mixer, cream together margarine, sugar, and almond extract until light and fluffy. add flax meal paste and beat until smooth.

5. in a separate bowl whisk together salt, baking powder, and flours. 

6. alternate adding flour mixture and vinegar mixture to mixer bowl until well combined. pour batter in to prepared pan and knock on counter several times to remove any bubbles.

7. melt margarine in microwave safe bowl and add remaining ingredients. cut & mix with fork until there are even pebble-sized crumbles throughout.

8. spread crumbles over cake batter and pat down lightly. 

9. bake in preheated oven for 45-50 minutes or until knife inserted into center comes out clean. let cool completely.

10. once cake is cool, stir together all icing ingredients and drizzle over cake. let set and dry.


nutritional information

calories: 258, fat: 10.25g, sodium: 184 mg, carbs: 39.5g, fiber: 1g, sugars: 25, protein: 2.34g.


thanks for reading & happy baking!

amanda

Sunday, March 13, 2011

homemade graham crackers


these homemade graham crackers were the perfect next step in my battle against perfection. i mentioned in my quiche post about how tempting it can be to only post professional-grade cakes & cookies, but to me that takes away from the heart of baking and i'm determined to show you all everything - the gorgeous, the yummy, and everything in between. 

instead of using a cookie cutter i just free-handed the cutting process and i am kind of in love with how unique they each are. i may have to eventually cave and buy a scalloping tool to give the edges a little pizazz, but they are equally adorable cut with a sharp knife.


this dough came together quickly and with almost zero effort. i was careful not to over-mix, which would make the dough tough, and combined dry with wet until it was 90% mixed and then did the rest by hand. 


the heat of your hands will help smooth out the dough before you stick it between two pieces of floured parchment. sandwiching dough between parchment is something i do for every roll-out cookie i make, i wouldn't tackle the process without it! 


one of my favorite parts of this whole process was poking the traditional graham cracker holes in these suckers. the surprise was finding out that this step happens post-freezing. who knew! 


i ended up using these cookies as a make-shift spoon for my coffee ice cream a few nights ago. do i own spoons? yup. are they as delicious as cookies? nope. what i learned, but was too lazy and impatient to actually do, was that these would make an absolutely perfect cookie for ice cream sandwiches. summertime, here i come!


homemade graham crackers

pretty seriously modified from martha's recipe
yields approximately 30

3/4 cup all-purpose flour
3/4 cup cake flour
1/4 teaspoon salt
1/2 teaspoon baking soda
1/2 teaspoon cinnamon
1/4 teaspoon all spice
1/4 teaspoon nutmeg
1/2 cup butter
1/4 cup + 2 tablespoons dark brown sugar
1 tablespoon honey

1. preheat oven to 350 degrees. whisk flours, salt, baking soda, and spices in a medium bowl, set aside.

2. in the bowl of stand mixer, cream together butter, brown sugar, and honey. add flour mixture and beat until just combined.

3. using your hands, shape dough into a smooth-ish ball, and place between two sheets of floured parchment. roll out to about 1/8 inch thick. (note: mine are obviously thicker and i sort of like them like that, it's this cracker-shortbread-biscuit hybrid, but you can choose your own adventure with this one.)

4. cut out desired shapes and place on another sheet of parchment. chill in freezer until firm, about 20 minutes.

5. remove dough from freezer and pierce crackers using a fork. transfer to baking sheet lined with parchment and bake, rotating halfway through, until dark golden brown (8-9 minutes, depending on thickness). let cool on wire racks.


nutritional information*

calories: 63, fat: 2.9g, cholesterol: 8mg, sodium: 41mg, carbs: 8.3g, sugars: 3.27g, protein: 0.64g

*this information is totally dependent on how many you yield. if it helps, the total caloric amount for the entire batch is 1890 cals, which you then can divide by how many cookies you end up getting for a more accurate number.

thank you for reading & happy baking!

amanda

Tuesday, March 8, 2011

vegan oatmeal raisin lace cookies


let me take you all on a quick trip down memory lane. since what i understand as being the beginning of time, my favorite cookie in the world has been a super-thin-but-still-chewy cookie my little sister has made. the recipe is completely in her head and obviously top secret, but if i'm really lucky she will whip up a batch for me and they will be gone in less than a day. 

let's fast forward on this journey a bit to a few months ago when my lovely boss brought me back a cookie from a local coffee shop. it didn't look like anything special in its little cellophane baggy, and it was my first experience with a vegan baked good, but as soon as i took my first bite i was in love. 

these oatmeal raisin lace cookies are gorgeous, golden-y brown, and vegan-tastic. they are the perfect combination of my two favorite cookies and, i can now officially say, my cookie trifecta is complete. 


these cookies have two kinds of fat (earth balance and vegetable oil) and three different sugars (raw, brown, and a little bit of granulated). these all get creamed together until they're light and fluffy before the next surprise ingredient gets added. 


flax! yup, my favorite ground meal makes a return as a substitute for eggs. all it takes is a 3:1 tablespoons water to flax meal ratio and around two minutes of time for the magic to happen. 


here's what the batter looks like after the fats and sugars have been creamed and the flax meal has been added and beaten in. the batter will get a little fluffier at this point, just like if you had used actual eggs. cool, huh?


while you dream about how good these cookies are going to make your kitchen smell, here are some quick tips on how to maximize the deliciousness of this particular recipe. 

tip #1: soak your raisins in tap water for about an hour before you start baking. this will bring them back to life and make their flavor more pronounced. 

tip #2: these cookies spread a lot. like, a lot. my standard two teaspoon portion spread to cookies with about a four inch diameter, which fit around six to a cookie sheet. you could do tablespoon-sized cookies for a jumbo version, just make sure that you give these babies a little room to breathe. 

tip #3: i always find my vegan cookies to get soggy, a problem i'm still trying to figure out, but my solution to keep these crunchy was to leave them out in a single layer overnight. i actually never ended up bagging these at all because i was afraid their thinness would lead to quick breakage. if you have any ideas on how to prevent this minor issue i would love your advice!


vegan oatmeal raisin lace cookies

yields 30 cookies

ingredients:

1/4 cup margarine
1/4 cup vegetable oil
1/2 cup packed brown sugar
1/4 cup raw sugar
2 tablespoons granulated sugar
1 teaspoon pure vanilla extract
1 tablespoon flax meal
1/2 cup + 2 tablespoons all-purpose flour
1 teaspoon cinnamon
1/4 teaspoon ginger
1/4 teaspoon allspice 
1/2 teaspoon baking soda
1/4 teaspoon salt
1 1/2 cup oats
3/4 cup raisins

directions:

1. preheat oven to 350 degrees and line baking sheets with parchment paper. 

2. place raisins in small bowl and soak in room temperature water for the duration of the preparation process. in another small bowl stir together 1 tablespoon flax meal with 3 tablespoons water and let sit for 2 minutes. 

3. cream margarine, oil, and sugars with a stand mixer until light and fluffy. add flax mixture and continue to beat until fully incorporated. add vanilla.

4. in a medium bowl whisk together flour, spices, baking soda and salt. 

5. gradually add dry ingredients to wet ingredients until well blended. stir in oats and raisins. 

6. drop dough onto lined baking sheets with enough room for spreading and bake for 10-12 minutes or until the edges brown and centers are set. 

7. remove from oven and let stand on baking sheets for 4-5 minutes. using an off set spatula, run blade between cookie and sheet to loosen and transfer to wire baking rack to cool. 


nutritional information:

calories: 100, fat: 3.77g, sodium: 54mg, carbs: 16g, fiber: 1.14g, sugars: 8.35g, protein: 1.74g. 


thanks for reading & happy baking!

amanda


Sunday, March 6, 2011

deep dark brownies with white chocolate drizzle


now, i'm not here to tell you that i'm a top chef. or an iron chef. i'm not even a rachael ray. but, i will say that these brownies are outstanding and maybe, just maybe, worthy of one of those titles. except the rachael ray one, she's down right annoying. 


the secret to my success* lies in using the cocoa with the highest percentage of cacao you can find. essentially, the darkest chocolate powder. this makes the brownies almost black in appearance and extremely rich in taste. 

* note: i define success by how much batter gets eaten before anything actually gets baked. in this case, it was a lot.


this recipe goes pretty smoothly until about halfway through where you will be told to randomly mix milk & cocoa into the batter. i'll be honest, the first time i made this i was caught a little off guard, with the general rule-of-baking-thumb being to mix the dry and wet ingredients separately until the very last step. but, i trusted the process and soldiered on. what i got was a semi-curdled chocolatey pudding that did not seem anywhere near brownie consistency.

i'm here to tell you, don't do i what i did (which was panic). take a deep breath and know that this little hurdle is simply there to weed out those who couldn't handle the intense brownies to come. you can make it through this - i believe in you!


i generally line my pans with parchment or aluminum foil when i make brownies because one too many times i've been left with a brownie bottom with so many craters it looks like the face of the moon. by using a lining (versus spray), i can pull out my whole loaf without the fear of stickage.

another helpful hint when it comes to brownies is to let them cool for as long as you can stand it. i let mine rest in the pan for almost a full hour before i slid them out and let them continue their journey to firm-dom on a wire rack. basically, you want them to be completely room temperature when you slice them up or risk there being a lot of crumbs and broken pieces.


i got a very oreo-vibe from this recipe, in both taste and appearance, so i decided to top them off with white chocolate drizzles. i actually wanted to title this recipe "faux-reo brownies", but i didn't know if that was just too cheesy. if i get enough support from the internet, though, i just might change it. 

this recipe is also fantastic because of its versatility. while making it i was thinking about how delicious mint chocolate chips would be mixed in the dark chocolate, or walnuts, or a vanilla buttercream topping, or caramel, or sea salt, or potato chips! listen, sweet & salty is a thing. 

if you come up with a creative take on this base let me know!

deep-dark brownies with white chocolate drizzle (or, faux-reo brownies!) 

yields 2 dozen squares
adapted from cooking light

ingredients:

1/2 cup butter, softened
1 1/2 cups sugar
1 teaspoon vanilla extract
2 large egg whites
1 large egg
2/3 cup unsweetened 100% cacao cocoa
1/2 cup skim milk
1 1/2 cups all-purpose flour
1/2 teaspoon baking powder
1/4 teaspoon salt

1. preheat oven to 350 degrees and line 13x9 inch pan with parchment or coat with cooking spray.

2. cream butter and sugar together until fluffy. add egg whites and egg, one at a time, beating will afer each addition. add vanilla and combine.

3. add cocoa and milk and beat - this is where it may appear curdled!

4. combine flour, baking powder, and salt in a separate bowl and mix with a whisk. 

5. add flour mixture to cocoa mixture 1/2 cup at a time on low speed until just combined. overmixing leads to tough brownies!

6. spoon batter into prepared pan and spread evenly.

7. bake for 30-35 minutes or until set. cool for 1-2 hours.

8. optional: once completely cooled, slice with a serrated knife or pizza cutter into even squares. melt 1/2 cup white chocolate in microwave on low until melted. pour chocolate into a ziploc baggy, cut at tip, and drizzle onto brownies. place in refrigerator to set for 10-15 minutes.


nutritional information:

cals: 142, fat: 5.22g, cholesterol: 19mg, sodium: 74mg, carbs: 22.4g, fiber: 1g, sugars: 14.72g.


as always, thanks for reading & happy baking!

amanda

ps: oh! and check out the newly-created about me page and my recipe index!

Friday, March 4, 2011

quiche florentine


i'm officially sick. i've been ignoring the tell-tale tickling in my throat for over a week because i've been so swamped at work, but whatever this is has officially arrived and i don't feel so hot.

now, i'm not the kind of person who can just lay around and recover. i actually tend to be more productive on my "sick days". i need stuff to do. so, when life handed me a cold i decided to make a quiche. and boy, was it exactly what the doctor ordered. warm, comforting, and light.

i made a mini-quiche with a four-or-five-inch-ish tart pan i have since i was only feeding two. the original recipe calls for a nine-inch pan, so i just halved the recipe. you decide what size is right for you!


this was actually my first time making a quiche and i was surprised at how easily the dough for the crust came together really quickly. i didn't have any ceramic pie weights or dry beans so my crust rose a little more than i would have liked, but you live and learn.


along with being unable to take a sick day i am, probably unsurprisingly, a perfectionist. okay..maybe closer to a control freak. when i was in art school i found myself drawn to polaroids because they forced me to give up almost complete control over my images. now, i find trying new recipes evoking the same emotions in me.

without going on too much of a tangent, i find that a lot of food blogs only post immaculate and/or completed versions of their dishes, but i in no way want to be that kind of food blogger. i make mistakes, things get burned, frosting melts, and crumbs are usually everywhere. i want to include images of imperfection so that if you make a mistake you know you are definitely not alone, and so when you are in the middle of baking something and it looks curdled and gross you know that's just part of the process. i want to do this because those steps are, generally, when i totally panic because the example on my computer screen is pristine and i just have a mess on my hands. end tangent!

(this stream of consciousness came from my internal debate about whether to post a photo of a pretty sad and uneven looking quiche crust.)


a quiche secret that i had no idea about until today was that all the fillings (in my case, gruyere & spinach) go in before the egg mixture. it was a good thing i read the instructions thoroughly because i would more than likely have just mixed them in with the eggs and made some kind of weird yolky soup. so! remember this step!


this thing came out of the oven warm, cheesy, and delicious. i ended up wrapping aluminum foil around my tart pan because of some crust malfunctions that led me to believe i would have egg leakage, which i ended up being right about. i will probably always wrap this tart pan before i bake it, but if you want to live life on the edge you can leave it foil-less.


for my first attempt at quiche-making i thought this recipe was super successful. i spiced up the egg "batter" with nutmeg and cayenne and went with a florentine-style by adding gruyere cheese and spinach. you could mix this up by adding ham or veggie sausage, switching up the cheese, or customizing the spices. i will definitely be making this again soon.

quiche florentine

yields 8
adapted from eating well

ingredients

crust:

3/4 cup whole wheat pastry flour
1/2 cup all-purpose flour
1/4 salt
1 tablespoon butter
3 tablespoons vegetable oil
1-2 tablespoons ice water

filing:

2 large eggs
4 large egg whites
3/4 cup skim milk
3/4 cup nonfat evaporated milk
1/4 teaspoon nutmeg
1/4 teaspoon salt
1/4 teaspoon pepper
pinch of cayenne pepper
1/2 cup gruyere cheese
1 cup frozen spinach, cooked and drained
1 tablespoon parmesan cheese

directions

1. to prepare crust: position rack in lower third of oven and preheat to 425 degrees.

2. whisk together flours and salt in a medium bowl.

3. melt butter in a small bowl in microwave. let cool slightly and stir in oil.

4. using a fork, slowly stir the butter-oil mixture in the flour mixture until it is crumbly. stir in ice water a teaspoon at a time until the dough holds together. knead the dough a few times in the bowl to help it come together. press the dough into a disk.

5. place the dough between two sheets of parchment or wax paper and roll into a 12-inch circle. remove the top sheet and invert the dough into a 9-inch pan. remove the remaining paper and patch any tears in the dough. fold the edges under at the rim and crimp.

6. line the dough with a piece of foil or parchment paper and fill evenly with pie weights or dried beans. bake for 7 minutes. remove the foil or paper and weights and continue to bake until lightly browned, about 3 to 5 minutes more. the crust will not be fully baked. let cool to room temperature on a wire rack.

7. the prepare filling, whisk eggs and egg whites in a large bowl. add milk, evaporated milk, nutmeg, salt, pepper, and cayenne, stirring gently to avoid creating bubbles.

8. to assemble and bake quiche: sprinkle cheese and spinach over the bottom of the prebaked crust. carefully pour in the filling. bake the quiche until a knife inserted in the center comes out clean, about 30-35 minutes. let cool on wire rack for 10-15 minutes before serving.


nutritional information:

calories: 222, fat: 9.65g, cholesterol: 65mg, sodium: 277mg, carbs: 21g, fiber: 1.33g, sugars: 3.15g, protein: 11g. 


thanks for reading & happy baking!


amanda

Wednesday, March 2, 2011

turkey & spinach stuffed shells


i love target. like, love target. why do i adore this megastore so darn much? because i can go there and get a new pair of jeans, granola, a lock for my suitcase, foam core, and a bottle of wine (my target now has WINE!) all in one trip. and for a girl who considers herself a productivity specialist, this absolutely rules.

to bring this introduction all the way home, i consider my le creuset french oven like a culinary target - it does pretty much everything and helps me get things done super fast. now, when we first got this giant green monster i was nervous about using it because i didn't fully understand its power. now that i do i'm completely crazy for it!

stuffed shells is one of my favorite meals to use this bad boy for because it can go from boiling pasta and browning meat on the stove right into the oven, which basically makes this a one-pan dinner. plus, you can make it in advance, store it in the fridge, and heat it up whenever you're ready for a delicious and super healthy meal.

(i promise i was not paid to say any of that!)


i lightened up the original recipe by using lean ground turkey, light ricotta cheese, and a ton of spinach. i'm actually a five year old trapped in a twenty-something's body and have to hide my vegetables to this very day, but the cheese and the carbs do an excellent job of that. 


i usually make this meal for just two people, but it would be super simple to double or triple the recipe and make enough for a crowd. i generally make five or six shells per person, which is generally more than enough, but you can adjust the quantity as you see fit!


one of my other sneaky-veggie-tricks is using a pasta sauce that is low in calories but high in vegetables and flavor. next time you're at the grocery store sneak a peak at the back of the sauce jars, the caloric range can be very surprising. checking on these amounts can be one way to cut a pretty significant amount of unnecessary junk out of your meal. 


nothing finishes off these shells like freshly grated high-quality cheese and a glass of red wine. dinner is served!


my boyfriend finished a seventy page paper and asked for a little treat, which i thought he totally deserved! i really wanted to use the six inch pan i picked up a few weeks ago, so i made a healthified milk chocolate cake and topped it with a lighter version of my signature buttercream. it's definitely not the most gorgeous cake i've ever made, but the tiny factor is extremely adorable and i wanted to include it. 

side note: i'm not sure how often i'm going to be doing savory dishes, this is a sweet-treat blog after all, but because this dish is technically baked i thought it might be a nice change of pace.

turkey & spinach stuffed shells

serves 2

ingredients

12 jumbo pasta shells, cooked and drained
1 cup frozen chopped spinach, defrosted
5 ounces ground turkey
1/3 cup onion, diced
1/2 cup low fat ricotta
1 egg white
1/2-1 garlic clove, minced
1 cup pasta sauce

directions:

1. cook shells and spinach according to the package directions. drain and squeeze spinach of excess moisture. meanwhile, brown ground turkey and onions in a pan over medium-high heat.

2. mix spinach, ricotta cheese, egg white, garlic, turkey and onion in a medium-sized bowl. 

3. preheat oven to 375 degrees and coat the bottom of baking dish with 1/2 cup of pasta sauce.

4. fill shells with mixture, about a tablespoon a shell, and place in coated baking dish. when all are filled and in dish, pour remaining pasta sauce over shells.

5. cover dish with oven-safe lid or aluminum foil and bake for 30 minutes, or until warm and bubbly.

nutritional information:


calories: 423, fat: 12g, carbs: 51g, protein: 34g, cholesterol: 50mg, fiber: 6g.


thank you for reading & happy baking!


amanda


ps: i'm still trying to find my groove and figure out what i want my blog to look like, especially in terms of ease of use and simple design, so i'm making some adjustments. let me know what you all think!